


Quick answer
Before every concrete pour, check formwork, rebar size and spacing, cover blocks, and cleanliness; after pouring, check curing for at least 7–14 days and get cube tests.
On this page
- Key takeaways
- The short answer
- Key points explained
- Pre-pour, during-pour and post-pour checklist
- Common defects and what they signal
- Why owners should insist on seeing test reports, not just verbal assurance
- A simple floor-by-floor documentation habit
- Who should actually perform these checks on a self-build
- How this checklist differs for a larger, multi-floor building
- What happens when a cube test result falls short
- How this applies to your project
- Frequently asked questions
Key takeaways
- Rebar as per drawing
- Cover blocks in place
- Vibrate concrete
- Cube tests at 7 and 28 days
01The short answer
Before every concrete pour, check formwork, rebar size and spacing, cover blocks, and cleanliness; after pouring, check curing for at least 7–14 days and get cube tests.
Most RCC defects trace back to a lapse at one of these checkpoints, which is why an owner or site supervisor walking through this list before and after each pour prevents the vast majority of avoidable problems.
02Key points explained
Rebar as per drawing means verifying the actual bar diameter, number of bars, and spacing on site against the structural drawing — not trusting it by eye; a common shortcut is using a slightly thinner bar than specified or wider spacing than drawn, both of which reduce the member's load capacity without being visible once concreted. A simple tape-measure check of bar spacing against the drawing takes minutes and catches most such substitutions before the pour locks them in permanently.
Cover blocks (small precast concrete or plastic spacers) hold the rebar cage at the correct distance from the formwork so the specified concrete cover is achieved; too little cover and rebar corrodes early from moisture and chloride ingress, especially in Mumbai's humid coastal air, while too much cover reduces the effective structural depth of the member. Cover requirements are typically larger for members exposed to weather or near the coast than for fully internal, protected elements.
Vibrating the concrete as it is poured, using a needle (poker) vibrator worked systematically through the depth of the pour, removes trapped air voids and ensures the concrete flows fully around congested rebar — under-vibration is the single biggest cause of honeycombing (visible gaps and voids on the concrete surface after formwork is removed). Over-vibrating in one spot for too long, however, can cause the heavier aggregate to settle and separate from the cement paste, so technique matters as much as simply running the vibrator.
Cube tests at 7 and 28 days — where sample cubes cast from the same batch of concrete are crushed in a lab to measure compressive strength — are the only objective proof that the concrete actually achieved its design grade (such as M20 or M25); the 7-day result gives an early indicator, but the 28-day result is the one that confirms design strength has been met. Keeping these test certificates on file, floor by floor, builds a documented strength record for the entire building that is valuable at resale or for any future structural assessment.
These four checks map neatly onto the three stages of a pour — rebar and cover blocks are checked before concrete arrives, vibration technique is applied while it is being placed, and cube testing confirms the result afterward — which is why a single supervisor walking through all four at the right moment, rather than checking them in the wrong order or after the fact, is what actually prevents defects rather than just documenting them once they have already happened.
- Rebar as per drawing
- Cover blocks in place
- Vibrate concrete
- Cube tests at 7 and 28 days
03Pre-pour, during-pour and post-pour checklist
Pre-pour: formwork is clean, properly propped and does not leak at joints; rebar is tied as per drawing with cover blocks in place at the correct spacing; all embedded items (conduit, sleeves, hold-down bolts) are positioned and checked against drawings; and a final joint inspection sign-off is taken before concrete is ordered.
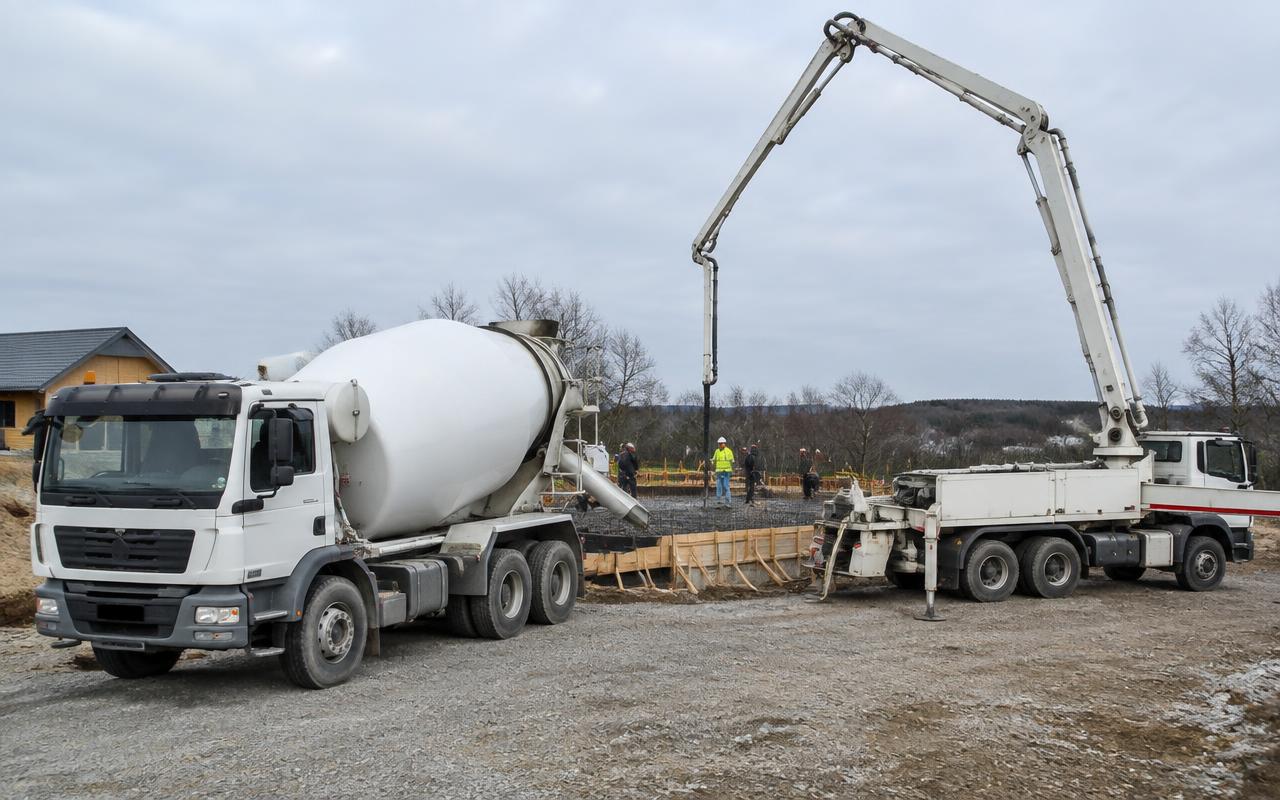
During pour: concrete is placed within the time limit after batching (generally within 30–90 minutes depending on mix and weather, to avoid the concrete starting to set before placement); it is vibrated in layers, not poured from excessive height which can cause segregation of aggregate from the cement paste; and sample cubes are cast from the actual batch being poured, not a separately mixed sample.
Post-pour: the surface is kept continuously moist (ponding, wet hessian, or curing compound) for a minimum of 7 days and ideally the full 14 days before the structure is loaded; formwork is only removed after the minimum stripping time for that member (slabs typically need longer support than beam sides); and the cube test results are filed and checked against the design grade before the next floor's work proceeds.
04Common defects and what they signal
Honeycombing (visible gaps in the concrete surface) signals insufficient vibration or a too-stiff mix that could not flow around closely spaced rebar — it needs to be chipped out and patched with a bonding agent and repair mortar, not just plastered over. Segregation (coarse aggregate separating from the cement paste, often seen as a gravelly, weak layer) usually comes from pouring concrete from too great a height or over-vibrating in one spot, and indicates a strength shortfall in that section that may need an engineer's assessment.
Surface cracking appearing within days of the pour (as opposed to months later) usually points to inadequate curing — the surface dried out before gaining strength — and is a preventable defect, not an inherent one. Any of these defects spotted at an early stage is far cheaper to correct than one discovered after the next floor's load has already been placed on top of it.
A fourth, less visible defect worth knowing about is low cover leading to early rebar exposure — this does not show up as a visible surface defect at all when the pour is fresh, and only becomes apparent months or years later as rust staining or hairline cracking along the line of the embedded bar, which is exactly why cover-block verification before the pour matters more than any post-pour inspection ever can.
05Why owners should insist on seeing test reports, not just verbal assurance
A contractor telling an owner that 'the concrete is fine' is not the same as a lab-issued cube test certificate naming the batch, the date, and the measured strength against the design grade. Owners building independently, rather than through a large developer with its own quality team, should specifically request copies of every cube test report as the building progresses, and should treat a contractor's reluctance to share these reports as a signal worth investigating rather than ignoring.
06A simple floor-by-floor documentation habit
Keeping a dedicated folder (physical or digital) for each floor's concrete work — the cube test certificates, a few dated photographs of the rebar cage before the pour, and a note of the concrete grade and supplier batch number — takes only minutes per floor but creates a complete quality record for the building.
This record becomes genuinely valuable years later: at resale, for insurance purposes, or if any structural concern ever needs investigation, a documented pour-by-pour history is far more persuasive than an owner's recollection that 'the contractor said everything was fine.'
07Who should actually perform these checks on a self-build
On a large developer project, a dedicated quality control team performs these checks as a matter of routine; on a self-built house or a small building where the owner has hired a contractor directly, these checks often fall through the cracks unless the owner either learns to do them personally or hires an independent site supervisor or structural engineer specifically for periodic quality inspection.
The cost of hiring an independent supervisor for periodic inspections (rather than full-time site presence) is modest relative to the value of the structure being built, and is one of the most commonly recommended safeguards for an owner managing a self-build project without in-house construction expertise of their own.
08How this checklist differs for a larger, multi-floor building
On a multi-storey building, each floor's slab should be verified against this checklist independently before the next floor's columns are started, since a problem in one floor's concrete that goes unnoticed becomes progressively harder and more disruptive to fix once additional floors have been built on top of it — this is why the discipline of checking every pour, rather than spot-checking occasionally, matters proportionally more as building height increases.
For taller buildings, it is also worth asking whether an independent third-party testing laboratory (rather than the contractor's own in-house testing arrangement) is used for cube tests, since independent testing removes any incentive, however small, for test results to be reported more favourably than the concrete actually performed.
A simple habit that scales this discipline across a whole project is a one-page floor completion summary signed off before the next floor's columns are started — confirming the cube test results met the design grade, curing was completed for the required duration, and any defects found were rectified — which turns the checklist from an informal mental routine into a genuine, auditable quality record for the entire building.
09What happens when a cube test result falls short
A cube test result below the design grade does not automatically mean the structure is unsafe, since concrete strength standards already build in a safety margin and a single modestly low result may still be acceptable once averaged with other samples from the same batch or assessed by the structural engineer against the specific member's actual load demand.
What it does mean is that the result needs a qualified engineer's review before construction proceeds further on top of that member — options range from accepting the result with no action needed, to non-destructive testing of the actual poured member (rather than just the test cubes) to confirm in-place strength, to in rarer cases strengthening or even removing and recasting the affected section, and the appropriate response should always be an engineering decision rather than left to the contractor's own judgment alone.
10How this applies to your project
Every plot is different — soil, access, approvals and budget change the right answer. MumbaiConstructions's engineers review your site and drawings and explain the options with costs, so you can decide with confidence.
Get a free site visit in Mumbai, Navi Mumbai & Thane
MumbaiConstructions is a civil construction company and turnkey contractor serving Mumbai, Navi Mumbai & Thane and the wider Mumbai Metropolitan Region since 2009. Share your plot or building details and a project engineer will visit, check feasibility and send a line-item BOQ within 7 working days — no obligation.
Frequently asked questions
Does MumbaiConstructions help with this?
Yes. We offer free site visits, feasibility advice and a line-item BOQ across Mumbai, Navi Mumbai, Thane, Panvel and nearby areas.
Where do you work?
Mumbai Island City and suburbs, Navi Mumbai, Thane, Kalyan-Dombivli, Panvel, Vasai-Virar and surrounding MMR towns.